Android 2.2 (Froyo) Review
The newest version of the Android Operating System has been codenamed Froyo (as in Frozen Yogurt).
Although I have heard of the name, I was not following very closely the development of the said OS, so I did not know what to expect. The presentation on Day 2 at Google I/O was more than impressive, so I had to get my hands on it :)
After the GoogleIO presentation, I was regularly checking (Settings – About Phone – System Updates) my phone to see what kind of version I am running and whether the update was waiting for me. Unfortunately I was disappointed every time, therefore I resigned to the idea that it will update when it is pushed to my phone.
A few days later though, reports on the blogosphere started appearing of users now running on Froyo. The update started rolling out, so it was a matter of time for me. Most of the reports were coming from California, so if I were to look at the geography, it would take the update quite a bit of time to reach West Virginia :)
Through my regular research on the Internet, I found a few interesting blog posts that claimed that one can update the Nexus One without waiting for the update to be rolled out. Having nothing to lose, I decided to try it on my phone and see what happens.
Upgrade to Froyo
Below is how I upgraded my Nexus One to Froyo. I had a couple of failed attempts, loads of Googling, but I finally managed to get it to work. Luckily a couple of days later an article appeared on Lifehacker which confirmed that the steps I took were the correct ones!

I connected my Nexus One to my computer using the USB cable.
The phone was detected and I mounted the SD card from the phone (bring down the notification area and select the USB connection – select mount to mount the SD card)
When I performed these steps I had to navigate to a URL on the Android website (see article on Lifehacker).
I copied the file and pasted it on my newly mounted drive which was the SD card of my Nexus One
The file is 45Mb and when the copy was completed, I unmounted the SD card from the computer initially (click the status area and select *Safely remove
The update instructions below are the original work of SimonNWalker and can be referenced here.
With the update file uploaded on the Nexus One, all I had to do is shut down the device so that I can reboot it in recovery mode. The steps I took are as follows:
I clicked and held the power button until the menu appeared. I selected Power Off, confirming that I wish the phone to power off.
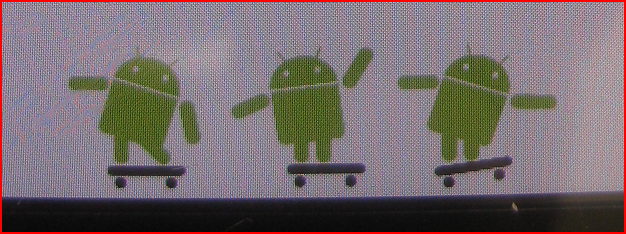
Once the phone powered off completely, I pressed and held the trackball button down and then pressed the power button. A new screen appeared (which, like myself, you probably have never seen before) with three androids on skateboards at the bottom and several options at the top.
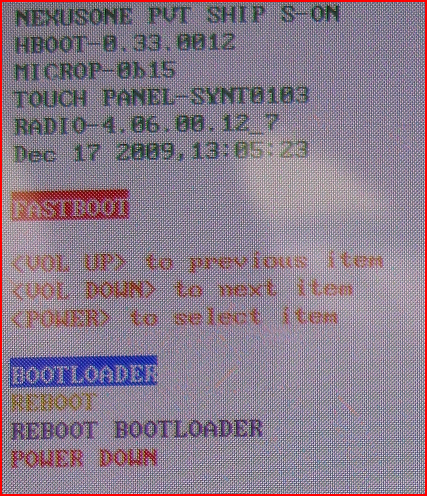
I navigated using the power and the volume buttons. I selected the first option (Bootloader) using the volume buttons and pressed the power button to activate it.
A new menu appeared with the following options:
FASTBOOT
RECOVERY
CLEAR STORAGE
SIMLOCK
I navigated to RECOVERY and selected it
The familiar Nexus One X appeared on the screen. A few seconds later, a little android with a big exclamation mark in a triangle replaced the X.
The next step I took was to press simultaneously the power button and the volume up button.
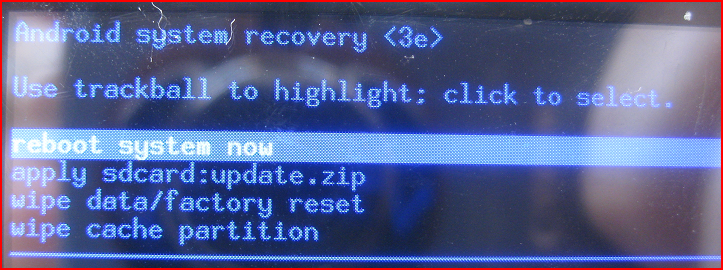
This brought a new menu at the top.
The options available were:
- reboot system now
- apply sdcard:update.zip
- wipe data/factory reset
- wipe cache partition
Using the trackball, I navigated to the second option and pressed the trackball button down.
At this point the update started and some information was flashing on the screen for a while, where some files were patched, some deleted, new ones copied and others replaced accordingly. The whole process took roughly 5 minutes from start to finish.
Features that I found
Please note that these are my own observations. Some features here might have been present in the previous version of Android (Éclair) and I simply did not notice them. If that is the case please let me know and I will correct the post accordingly.
Phone search (Search throughout the phone itself)
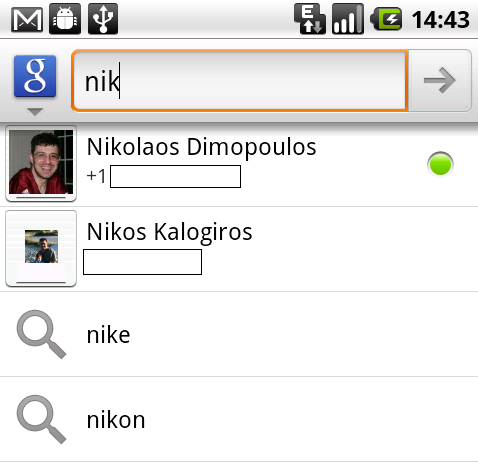
This is one of the updates that I just love. Froyo allows you to search a lot of content that is stored on your phone. The content includes your contacts, sms messages, applications, Twitter feeds and many more. With all this power it is very easy to find the information you are looking for with the press of a few keys on the virtual keyboard (Figure 4).
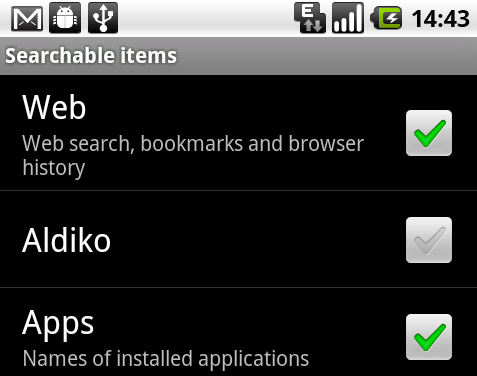
Since with great power comes great responsibility, Froyo allows you to select what can be searched. Go to Settings - Search - Searchable Items and you will find the following options:
- Web (web search, bookmarks and browser history)
- Aldiko (only if you have it installed)
- Apps (names of installed applications)
- Contacts (names of your contacts)
- Finance (stock tickers, company names) (only if you have it installed)
- Google Sky Map (only if you have it installed)
- Messaging (text in your messages)
- Music (artists, albums and tracks)
- Twitter (searchable tweets) (only if you have it installed)
I am sure that the search extends to other applications. Your results might vary based on the apps you have installed.
Tethering - Wi-Fi Hotspot
When I first heard about this feature during the presentation of Froyo at Google I/O>, I was really excited.
I spend every day 3 hours on the train, where I mostly work on my notebook. Having the ability to tether my phone and work online is essential. A couple of years back when I bought my first iPhone, I managed to jailbreak it and installed iPhoneModem on it to achieve the functionality that I wanted (tethering). It wasn’t fancy (after all don’t expect miracles with AT&T’s EDGE network) but it worked. I could get my emails reply quickly and disconnect.
When I got my Nexus One, I bought PDA Net to achieve the same result. It worked too but again in a very basic mode, but it was draining the battery very fast and was running the phone very hot.
After I upgraded to Froyo, I uninstalled PDA Net and have been working with the built-in functionality ever since.
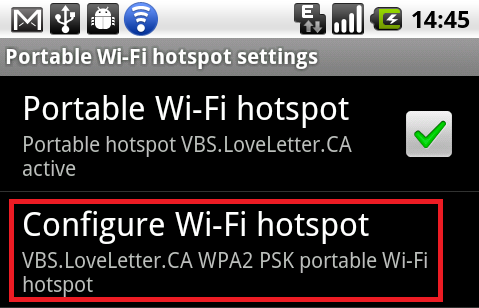
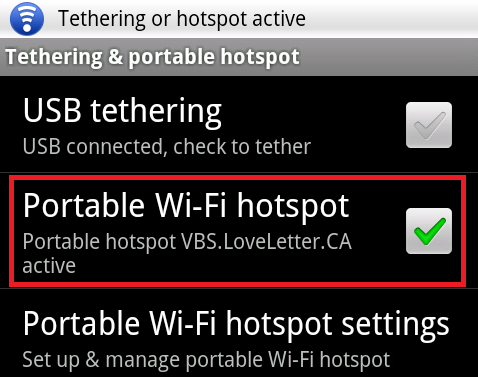
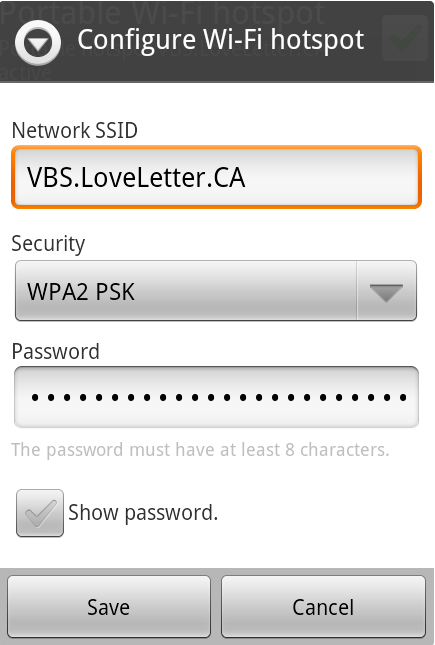
To access the Tethering options, you will need to go to Settings - Wireless & Networks - Tethering & portable hotspot. The options shown on Figure 6 appear, which allow you to switch the Wi-Fi hotspot on or off. A USB tethering option also exists for those that want to keep their phone charged with the power that comes from their notebook or attached device. Once the hotspot is enabled, a blue icon appears at the top notification bar. The configuration of the hotspot is really easy and can be seen in figures 7 and 8. For those wondering why I chose the SSID of my hotspot to be one of the most infectious (Windows) viruses ever, it is exactly for that reason. Apart from the WPA2 encryption, the name itself is a deterrent for anyone that might get ideas in stealing bandwidth.
Everything works perfectly apart from AT&T’s EDGE network, which is really slow. The Nexus One I have can support T-Mobile’s 3G network. I haven’t switched to T-Mobile yet since there was no need. I fear though that I will not be able to escape the inevitable.
On June 2nd AT&T issued press release where they showed us once again that they don’t give a damn about their customers since they lie, deceive and overcharge for a mediocre (at best) service. You can read the press release and draw your own conclusions but to me, it seemed once again a slap in the face.
No more unlimited data plans for new customers, yet it is not clear what will happen to existing customers such as myself. I read somewhere in the blogosphere that those plans will remain as is, but this is AT&T that we are talking about - the same company that claims that calls to 1-800 numbers are free, yet they charge you minutes for it.
I have signed for the unlimited data plan, yet AT&T does not allow me to tether. Why? What difference does it make? They still offer the same crappy EDGE network whether I watch a YouTube video on my phone or on my computer. The answer is in the press release. They want more money. As phones get ‘smarter’ they phone companies get greedier. John Gruber offers a good analysis of the new AT&T data plans.
I do not know how this will evolve, but I will definitely continue using the Wi-Fi hotspot on my train ride, whether this will be with AT&T or T-Mobile. Perhaps if I change to T-Mobile I will be able to have better coverage. AT&T in West Virginia is not the greatest carrier. Notable is a recent phone conversation that I had with my wife while I was driving (I am wearing the headsets btw) where the line dropped 9 times :(
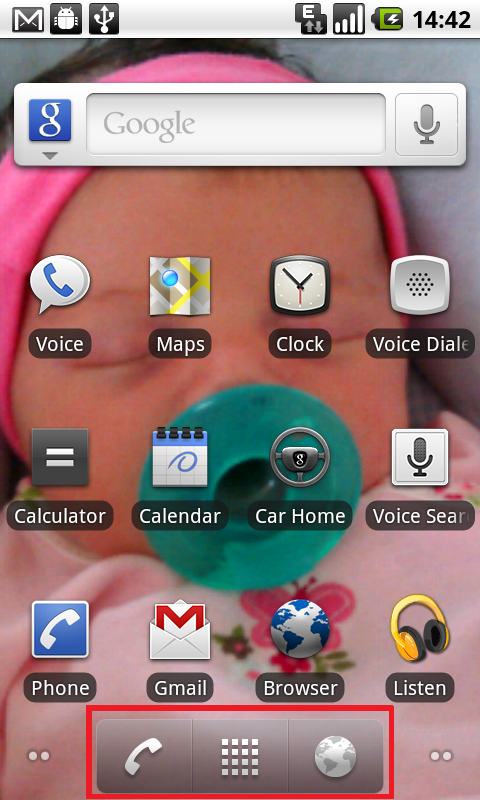
Phone/Web buttons at the bottom of every screen and desktop
This was something that was needed in my opinion (Figure 9). I was pressing way too many buttons to get to the phone, especially if I was not on the main screen. This little shortcut is very well received and thought of. I do not think that there is enough space for an additional 2 buttons (for the future release of Android) but you never know.
Perhaps a future version will allow you to customize those buttons.
Android development though has to be very cautious when releasing functionality. I am sure that Apple is checking everything that Android does with a microscope. With their enormous patent book nearby, they will not hesitate to sue Android (or Google for that matter) for patent infringement (see Apple sues HTC).
More accounts to sync with
This area can be accessed via Settings - Accounts & sync settings<.

I noticed that not only my regular GMail and Google Apps accounts appear but also YouTube as well as Twitter. I have installed the official Twitter application, so I am pretty sure that this synchronization appears because of that application.
I have not tried it with Seesmic or any other twitter application, so if you have any additional information please let me know and I will modify this post accordingly.
I would also be very interested to know which other applications offer synchronization capabilities or take advantage of Android’s synchronization API. If you have any other applications that synchronize on your phone, please let me know and I will include it in this post too.
Easy account switch (Email)
When I switched from an iPhone to an Android based phone, certain things were just “not right”, not because there was something wrong with them - it was how I was used to things being done. One of those areas was the email. With the iPhone I was used to a traditional listing of accounts and then once something was selected I would go into the folders and then emails. If I wanted to change accounts I would have to go back two steps and then enter the account that I wanted.

This seems a very logical approach, and it is easy to get used to. Although the Android has a better email management interface, it lacked the ability to quickly switch accounts and thus not spend time tapping away going back or forth. In that area the iPhone was better. Note the was. It was not because the user will tap fewer times, but because you would tap the back button twice which was located in the same area of the screen at all times. For the Android you had to press the menu button and then select Accounts. This was again the same amount of steps but the iPhone approach felt more natural.
With Froyo a new button appears at the top right of your email screen which will allow you to quickly go to the account selection screen. This effectively reduces the steps by one.
Analyzing briefly my emails, I can say that on average I receive 25 emails on my personal account and 35 on my business (I chose the two accounts that I get the most traffic). So if in theory I get two emails every time I check my email, that would mean that I am checking my phone 12 - 17 times a day (assuming again that I get the batches of emails on both accounts at the same time). It would therefore be safe to assume that I check my emails 15 times a day when I need to switch from one account to another.
So the math gives us:
| Taps | Average Email Checks per Day | Week | Month | Year | ||
|---|---|---|---|---|---|---|
| iPhone | 2 | 15 | 210 | 900 | 10,950 | |
| Android | 1 | 15 | 105 | 450 | 5,475 |
Clearly with the above I am using now half of the screen taps than I used to with Android Éclair or with the iPhone. However, the rough calculation shows how much I was tapping in the past prior to Froyo. Goodbye RSI. :)
Colored labels in your email (like GMail)
If you are like me and use Google Apps or GMail, you are by now accustomed to the colored labels on your emails, that you don’t know what you have been doing without them all this time.
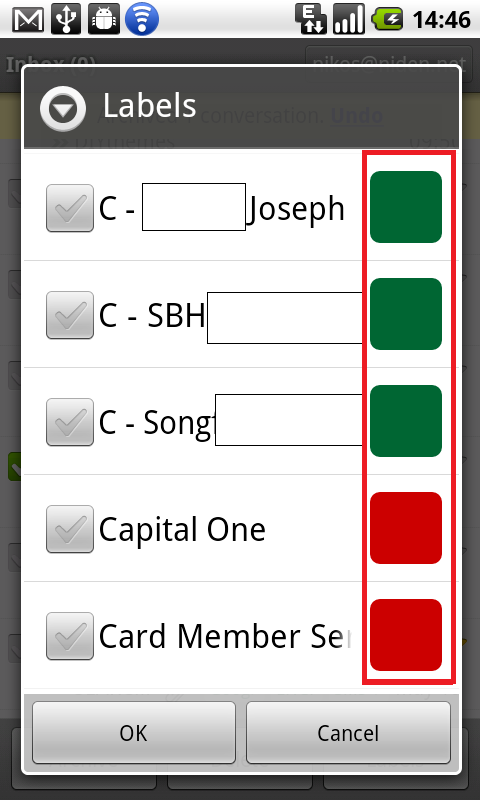
With Froyo, this functionality is now available in my mobile device allowing me to visually identify emails of high interest.
For instance, Figure 12 shows my setup. As you can see I mark clients with a green label color and financial institutions (bills mainly) with a red color. When an email reaches my mailbox and is automatically labeled due to a relevant filter, I can easily identify its importance using this color coding.
Having this functionality on my mobile device is invaluable!
Easier navigation between emails - New < > buttons appear on the phone to get you from email to email
Another huge improvement in the navigation part as far as emails are concerned came in the screen where I read a specific email.
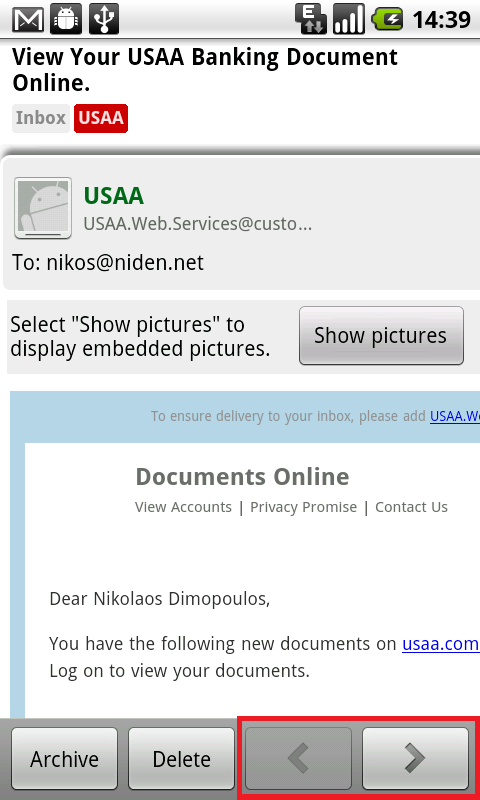
There are two extra buttons at the bottom of that screen which allow navigation to the previous or next message.
Another great tap saving feature!
Better voice recognition
I had some problems with this feature from time to time primarily due to my accent – a blend of Greek – English British – German and English American. After a few tries on the new system, I can say that there is improvement since it recognized now queries that it had failed in the past.
The voice search will probably never be able to detect everything that everyone is saying due to the different accents and voices of people, but it is getting pretty close to perfect in my case.
One thing that I love about voice search is the voice navigation. I have purchased the car dock for my Nexus One and I use the voice navigation almost everywhere I go. Understanding that I want to go to Rockville, MD instead of Rock Creek is awesome!
Marketplace – Update all, autoupdate for each application
This feature was missing and was probably one of the ones that were mostly requested by the users. The Update All to the installed applications.
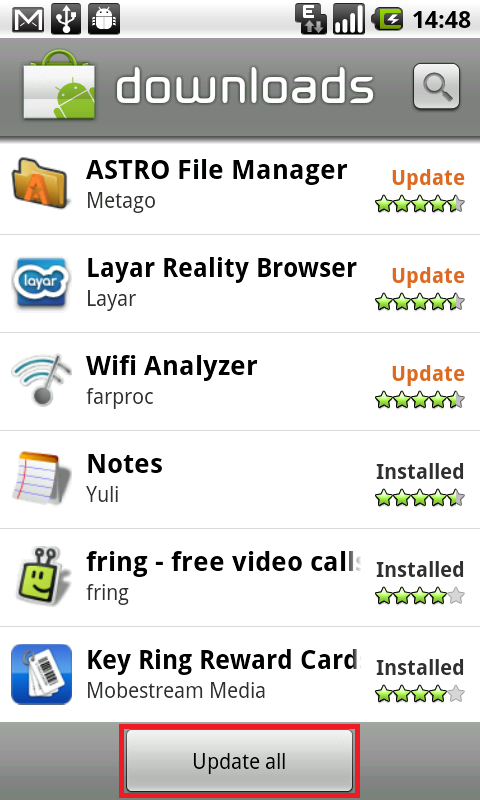
Luckily the Android developers have heard our pleas and Froyo now features an Update All button at the bottom of the Downloads section in the Marketplace application.
Adding to this functionality, the user now has the ability to automatically update selected (or all) applications. When clicking on one of the applications to update, a checkbox appears which allows for automatic updates. If the checkbox is checked, the next time the selected application has an update, the phone will download it and install it.
There will always be a notification regarding the action in the notification area, but unless you know where the application is coming from (and you trust the source) you should keep this checked off. I know I might be getting a bit paranoid here but that is what I did.
Different notification for Text Messages (trackball)
I am not sure if this existed in Éclair, but I just noticed it. When an email arrives, the trackball will start glowing briefly in regular intervals with a white color to visually notify me about the email(s) waiting for me.
If I receive a Google Voice message though, the trackball will still start glowing but this time it will be with a green color. This way I know that a text message is waiting for me.
I have sent a text message to my AT&T number and did see the trackball glowing but this time it was only white. It appears that the green trackball notification is a feature of Google Voice on Froyo, or again it was always a Google Voice feature and I hadn’t noticed, at which point I am getting excited for nothing :)
New icons for USB Connect/Disconnect and USB debugging
These I loved them the first time I saw them. If USB debugging is enabled (Settings - Applications - Development - USB Debugging), the minute the phone is connected to the computer using the USB cable, a new icon will appear in the notification area (Figure 15). It appears that it is an android bug of sorts :)
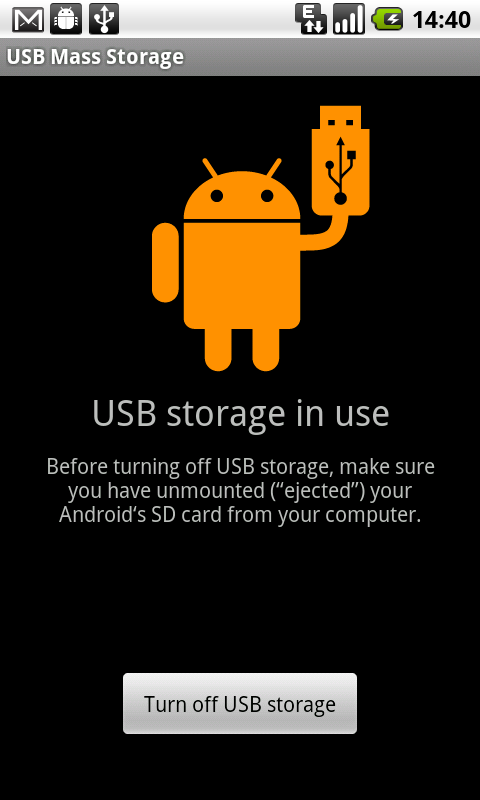
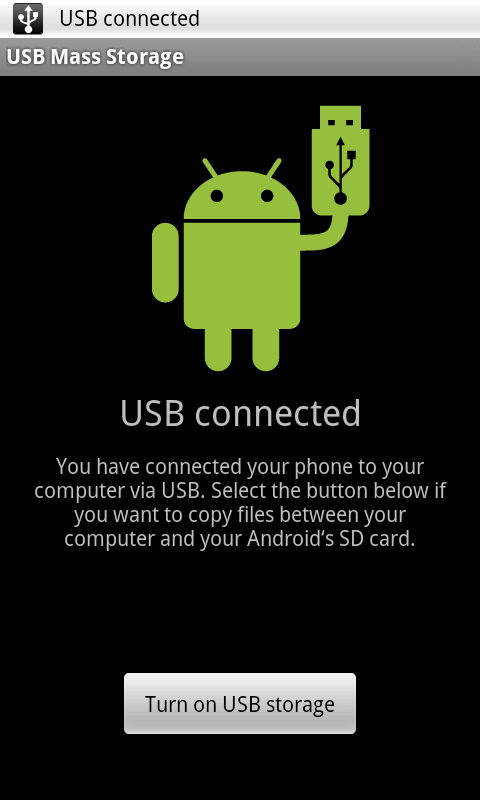
When the phone is connected to the computer via the USB cable, the user has the ability to use the SD card as a storage device. Once the relevant entry in the notification bar is tapped, the screen with the “Turn on USB storage” will appear. If I switch the USB storage on, the screen changes slightly.
These were two really cool (in my view) new screens that engage the user even more in exploring their device!
Camera control
A new enhancement appeared in the Camera application (Figure 18).
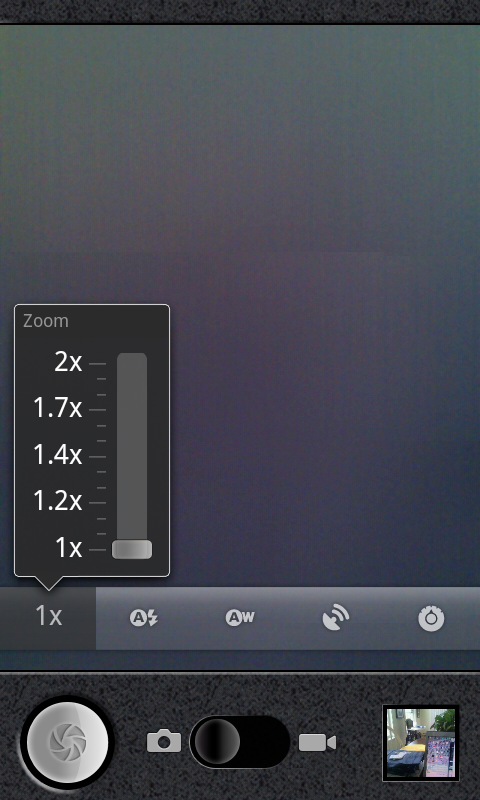
The new menu that changes position based on the orientation of your phone (horizontal or vertical) allow for zooming, flash control, white balance control, geolocation and exposure.
The options available are:
- Zoom: 1x, 1.2x, 1.4x, 1.7x, 2x
- Flash mode: Auto, On, Off
- White balance: Auto, Incandescent, Daylight, Fluorescent, Cloudy
- Store location: Off, On
- Focus mode: Auto, Infinity
- Exposure: -2, -1, 0, +1, +2
Unfortunately these controls only appear when taking photos and not when shooting video. I am sure however that this functionality (and more) will be extended to the video capturing aspect of the camera application.
Select text
This is an area where the iPhone was far better than the Éclair and unfortunately still is with Froyo. The gap though has decreased significantly.
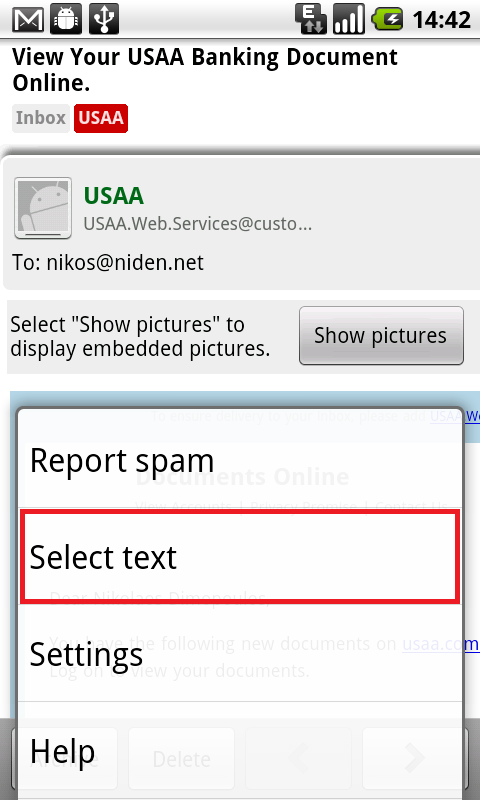
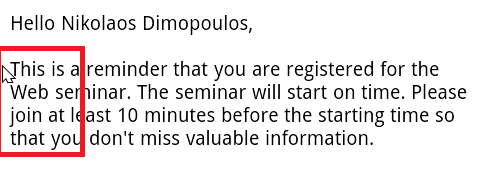
With Froyo I can now select text from say an email and paste it somewhere else - even a different application. The Select Text option is hidden under the More menu button and once selected, it creates a small mouse pointer. That is the start of where it will start selecting (Figure 20).
I simply point to the top left area I want to copy from and drag my finger diagonally to end up at the bottom right of the area I want to select. This will select the text in a very appealing pink color and as soon as I lift my finger from the screen it will copy the text on the keyboard (Figure 21).
The technique on the iPhone is better but not by much - as I wrote the gap has decreased significantly. On the iPhone you have a magnifying glass where you can pinpoint exactly where you want to start copying (or inserting text - same functionality).
Again unfortunately this functionality (the one with the magnifying glass for selecting text) is patented by Apple Inc. and will not be seen on an Android based phone, but I am sure that the Android developers will come up with something that will give us the same if not better user experience.
FLASH Support
Steve Jobs never kept secret his thoughts about Flash support on an iPhone. Although many people were hopeful that something will be worked out with Adobe in the end, Mr. Jobs shut the door on Adobe. Adobe then invested time and resources to work something out and right before they were able to release their solution Apple changed the iPhone Developer License Agreement to allow only applications written in Objective-C, C, C++ or Javascript and executed by the OS Webkit engine. Adobe had enough and issued a ‘screw you apple’ (not officially of course).
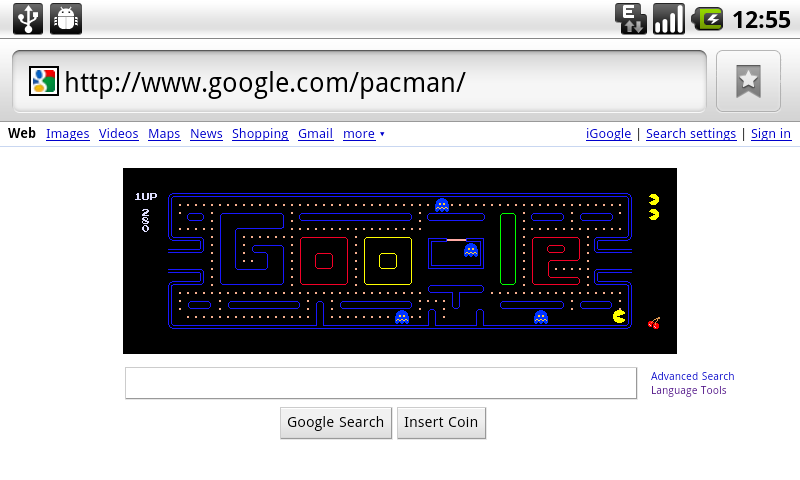
The presentation on Day 2 at Google I/O included the news that Flash will be allowed and supported on Android based phones that run Froyo (or newer versions).
I have to admit, the first version of Flash that I installed (it is still in BETA) was really slow. However, three versions later, I am happy to announce that it works as well as a desktop machine. I have not tried to load a heavy flash based website but my brother-in-law’s website (www.dnm.gr) loads just fine, and you can see all the information that you need to see :)
I am sure that in the coming months we will see a lot more progress in that area.
Conclusion
The Android 2.2 (Froyo) is a huge step forward. It provides users with a lot of functionality that transforms a phone to a multifunction communication device. The only thing that we are missing now is proper coverage from the national carriers (AT&T this one is for you) and without having to sell our firstborn children to pay for the monthly bills (AT&T this one is for you too).
Update
There has been another blog post on AndroidAndMe explaining how to update Froyo to the latest build (this one is a patch not the real thing).
Update 2010-07-04
Happy 4th of July! It came with the update for Froyo (officially now) on my cellphone. I am now running the FFR91 build (and so does my wife).